Saturday, June 30, 2012
Friday, June 29, 2012
Wednesday, June 27, 2012
DIY : Highlighter
Highlighter is one of my favorite products when it comes to make up! Using a highlighter not only helps to drag the attention to the parts of your face that you want to emphasize but also makes your skin glow and gives you that dewy finish you see in magazines!
Some basic rules when it comes to highlighting are :
1. Your highlighter must be either the same color of your skin tone or a tone lighter.
2. Your highlighter is not to use all over your face, just on the highest parts of it. It is not to be noticeable but it should enhance.
3. Less is definitely more....don't make your face look like a disco-ball.
4.All that glitters...is not a highlighter.
5. Never highlight heavily blemished areas, it will just bring them out more.
The parts of my face that I highlight and I think that suits any face shape are :
1. Underneath the eyebrows.
2. The temples and highest part of the cheekbones.
3. The nose bridge,
4. The cupid's bow.
So as I promised you on the title of this post I will show how I make my own "homemade" highlighter.
Since the product is not to be obvious I prefer cream textured highlighters in order to avoid any cakeyness.
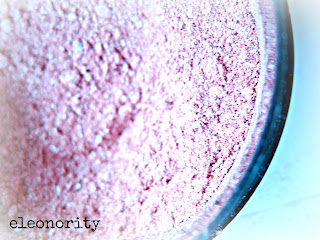
All you need is as shimmery (not glittery!) and not too pigmented powder eyeshadow in a neutral color that matches your skin tone or a shimmery light face powder.
The second (and final!) product that you need is some moisturizing cream. I suggest using a light textured one because you will be applying it on top of your regular moisturizer and/or your base.
Now all you have to do is mix together the powder and the cream. You can adjust the amount of the powder that you'll use according to your needs. If a really shiny finish is what you want then add more powder but if you are going for a settle finish then you don't need to put a lot.
And that's it! Your done!
Here's a picture of me after I used my homemade highlighter!
So what about you? Do you like highlighting your face? What kind of highlighters do you prefer using?
Thank you all for stopping by!
xxxx
Eleonor
Monday, June 25, 2012
Skincare routine
We all like to take care of ourselves. We dress up, do our hair, put on some make up, have our nails done...all these little things make us feel better! Some of us (me included!) won't even leave the house without a quick make over and you know what?...It's absolutely ok! It is important to feel comfortable with your looks and if a few coats of mascara (even if it's 7 am) will give you a boost of confidence then just go ahead and do it!
One of the most important things when it comes to beauty care,is our skin of course! A bright healthy skin that glows from within will help you look gorgeous on any occasion. You don't have to spend a fortune on your skincare products. You just have to find what works better for you. So, don't hesitate to ask for samples before buying a full size product. And remember, no product is a miracle maker. What works for someone else may not work for you at all and the other way around.
So,here is my current skincare routine. Some of the products I really like and some of them I'm not going to repurchase. I'm going through a good skin period now, but it wasn't always like that. I use to have serious acne problems that I found I could face on my own, so I went to see my dermatologist who suggested that I should have a treatment. I did and for the last 2 years my skin is in it's ever best condition...and I hope to stay that way!
Removing ALL of your make up before you go to bed is very important. Your skin needs to breath and the time to do that is...while you are sleeping. Try to use gentle products that want irritate your skin and please avoid all the rubbing and scrubbing, especially on your eyes. The skin around your is the most delicate and sensitive skin on your entire body...it worths to be treated gently. To remove my eye-makeup I use cotton pads soaked with BIOTEN Skin Moisture Eye Makeup Remover. Then I use cotton sticks to remove any remaining mascara between my eyelashes.
After that, to remove the rest of my makeup I use the SANT'ANGELICA Vivissima Softening Cleansing Cream. I put it all over my face and do a gentle massage and then I remove it with a couple of cotton pads.
When I make sure that my face is completely free of makeup I wash my face with my ELEMENTS 03 Foaming Face Cleanser.
So now my skin is completely clean! And what does a clean skin need? Hydration of course! For my eyes I use AVON Solutions Sensitive Botanicals Gentle Eye Cream and for the rest of my face AVON Solutions Perfect Tone Day Brightening Cream. In the morning I also use on my eyes and anti-puff roll-on from OMBIA Cosmetics.
If have any spots or blemishes I replace for the night my regular moisturizing cream with the AVENE Diacneal.
I make sure that once or twice a week I exfoliate my face with my ELEMENTS 03 Cacao Peeling Cream. After that I use a face mask (either the AVON Clearskin Blemish Clearing 3 in 1 or the SANT'ANGELICA Vivissima Peel-Off Mask).
So that's how I take care of my skin and so far it works just fine! What about you? What is your everyday skincare routine like?
Here are two videos of one of my favorite YouTube Gurus.The first one is about Makeup Removal and the second about her skincare routine.
Thanks for stopping by everyone!
xxxx
Eleonor
Saturday, June 23, 2012
Thursday, June 21, 2012
Collective Avon Haul
So, these are the products I've recently purchased from AVON. I must admit that I really like this brand. I think that they are high quality products and the prices are reasonable........IF you get them on a sale. My way of buying from Avon is to order only offers. Otherwise I think they are a bit on the pricy side.
So here's my last order!
- True Colour Blush - RUSSET
- Foundation Brush
- Supershock Max Mascara - BLACK
- Supershock Eyeshadow Pencil - CREAM DREAM & CHOCOLATE MELT
- Ultra Colour Rich Lipstick - RED
- Ultra Colour Rich Lipstick - INSTANT MOCCA
- Nail Experts - FRENCH MANICURE SET
- Nail Experts - PEELING AND BRITTLENESS SOLVER
- Nailwear Pro - ROMANCE
- Advance Techniques - Frizz Control
- Avon Naturals - Cherry Blossom Body Spray
- Crearskin - Blemish Crearing 3in1
- Advance Techniques - Heat Protector Styler
- Sleeptherapy - Restful Night Sleep Balm
If you would like more information or my personal opinion on any of these products please let me know.
So what about you? Do you ever buy from Avon? And if you do, what kind of "buying strategy" do you follow?
Do you have any idea how could I try the foundation shades? I often see really good offers on their foundations but I have no idea how to get my hands on any of their samples!
Thanks for stopping by everyone! Have a great one!
xxxxx
Eleonor
Tuesday, June 19, 2012
A birthday present!
A few days ago it was my birthday! - shhhh...I'm 27 now and I decided that from this year on I would not grow any older!...our little secret! ;) -
So, I got some birthday presents and I decided to share one of them with you, since I thought you might like it as much as I did! It's a small faux leather case.
Isn't it cute? Being a complete make-up junkie, the moment I saw it I though that it would be perfect to carry my make-up in it when I travel! But my excitement didn't stop there! I opened it and..........
........taraaaaaaa......it was full of make-up goodies!! How cool is that?!!
This little treasure box contains 8 shimmery pastel eyshadows, 2 mini nail polishes, a lipgloss (that smells like watermelon!).....
....2 tinted lip balms, another lipgloss, 2 lip pencils, an eye pencil, a mini mascara and 2 sponge applicators!
Out of all the products my favorite are the lip pencils (they're just so soft and creamy) and the lipglosses (I just love the watermelon smell of them!)
So, what do you think of my little treasure? If you would like to see swatches of the products I'd be more than happy to upload some for you. Just let me know!
Thanks for stopping by everyone! Ciao!
xxxxx
Eleonor
Monday, June 18, 2012
Photo album of a picnic at the beach
Yesterday was a hot sunny day. Not suitable for staying at home, cause that sun would call you to come out, but not good also for walking around outside, because it would feel like talking a walk to Sahara! So what a better way to spend such a day than with a picnic at the beach!
Of course in order to have a picnic you need to take with you more than your bikini and sunscreen. No problem for us! My other half did the shopping at the grocery store and I did all the cooking...all the cooking...well ok...I just put together some sandwiches but they were special ones! Here's all I needed :
- Whole wheat bread (since we are trying to make our sandwiches healthy)
- Philadelphia cream cheese (oops...we just forgot about the healthy part...it's not even the light version!)
- A few slices of smoked salmon (I love salmon!)
- A cucumber (it should be crunchy and fresh!)
Now pay attention to the recipe....it's a tricky one....put all the products
between two slices of bread. And then....oh wait there is no step two in this recipe. You're done! I guess no one could do that wrong! I'm sure that if you had any questions about the process of the sandwich making this photo made it all clear to you! (ok...I admit I put this photo just because I liked the colors of it...!)
Now, all we had to do was to pack everything well. Of course we didn't forget to take also some fruits, wine and sparkling water with us.
And off we go to the beach!!
Though the beach was full of people (who all probably had the same idea as we did) we were lucky enough to find a little almost private place behind some flat rocks!
So here's how we spent he next five hours......ahhhhh life should be like this all year round, don't you agree?
So, how did you spent your weekend?Thanks for stopping by!
Love
ELeonor
Saturday, June 16, 2012
My Weekend Make-up Bag
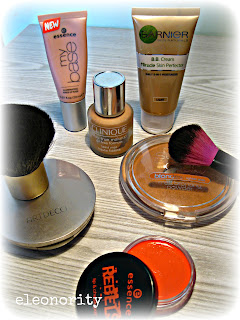
As I wrote on a previous post , I few weeks ago I had a long weekend with some friends and my other half. Our mini trip was quite a spontaneous decision so I only had a few time to pack. But of course a woman always finds the time when it comes to packing make-up! I didn't take a lot with me,just the very essentials (well...that's what I think anyway!).
I knew that the weather was going to be a bit hot and that we were going to spend some time at the beach so I stuck to light,creamy textures. Here's what was in my weekend make-up bag.
Face products :
- Liquid make-up (Clinique)
- Tinted moisturizer (Garnier)
- Illuminating base ( Essence)
- Fixing powder (Artdeco)
- Kabuki brush (Artdeco)
- Bronzer (Essence)
- Bronzer brush (Essence)
- Cream blush (Essence)
- Mascara (Maybelline)
- Eyeshadow base (Essence)
- Gel eyeliner (Essence)
- Eyeliner brush
- Eyebrow fix gel (H&M)
- Eyelash curlers (H&M)
- Double ended eye pencil (Avon)
- Eyebrow pencil (Essence)
- Cream eyeshadows (Essence)
Lip products :
- Chap stick
- Lipstick (Avon)
- Lipstick (Essence)
- Lipliner (Essence)
- Double ended lipgloss (H&M)
So what about you? What do you usually pack when you're going away for a few days?
Friday, June 15, 2012
Vanilla cupcakes recipe (part 2)
Here's the cream cheese frosting recipe I promised you! It's very simple and quick. You will need :
200 grams cream cheese. softened
1/2 cup (113 grams) butter, softened
2 cups confectioners sugar (oops, forgot to make a photo)
1 teaspoon vanilla extract
In a medium bowl cream together the cream cheese and butter until creamy.
Mix in the vanilla.
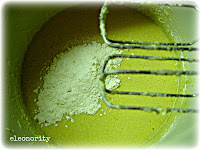
Then gradually stir in the confectioners sugar.
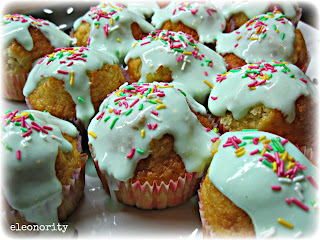
If you feel like putting a little color on you cupcakes add some food coloring in the cream cheese mixture (3-4 drops should be enough).
Frost your cupcakes one by one with a spoon and decorate as desired.
That's it! You're done! Bon Appétit
Wednesday, June 13, 2012
Blog awards
Yesterday I got my very first blog award ever by Cosmetic Girls. Thank you so much girls! You inspire me to keep blogging!
Now it's my time to pass this award to 5 blogs that I've been reading the most lately.
Keep up the good work girls! Vanilla cupcakes recipe (part 1)
Hello again!
A few days ago it was my daddy's birthday and as I wrote here I always bake something for the birthday of my beloved ones! As I am obsessed lately with trying to find the best cupcake recipe, I once again decided to bake cupcakes! Fortunately this time I had a little more time...so I didn't have to cheat like I did for my brother's cupcakes!
So I searched I bit on the internet to find a simple and tested vanilla cupcake recipe and I wrote it down to my little recipe notebook.
If you are a cupcake lover yourself read along!
Here's what you'll need :
3 large eggs
1 1/2 teaspoons baking powder
1/4 teaspoon salt
zest of 1 large lemon (this one is from my lemon tree in the back yard!)
1 teaspoon pure vanilla extract
1/2 cup (113 grams) unsalted butter, room temperature
2/3 cup (130 grams) granulated sugar
1 1/2 cup (195 grams) all purpose flour
1/4 cup (60 ml) milk
Ready??...... lets start!!
Preheat the oven to 180 degrees C.
Line 12 muffin cups with paper liners.
With the mixer beat the butter and sugar until light and fluffy.
Add the eggs, one at a time, beating well after each addition.
Beat in the vanilla extract.
In an other bowl whisk together the lemon zest, flour, baking
powder and salt.
With the mixer on low speed, alternately add the flour mixture
and milk, in three additions, beginning and ending with the
flour. Scrape down the sides of the bowl as needed.
Evenly fill the muffin cups with the batter and bake for about
15-20 minutes or just toothpick inserted in center comes out
clean.
Let them cool for 5 minutes in the pan and then remove them
from the muffin cups and let them cool completely.
Stay tuned for a cream cheese frosting recipe and pictures of the final result!Bon Appétit
I found the recipe at Joy of Baking,com
Subscribe to:
Posts (Atom)


